Rendering Panel
Quick Setup Before Rendering
Go to the Rendering Panel  Click on Current Renderer and ensure Rhino Render is selected.
This step ensures that you're using Rhino’s built-in rendering engine, unless you've chosen a different rendering plug-in.
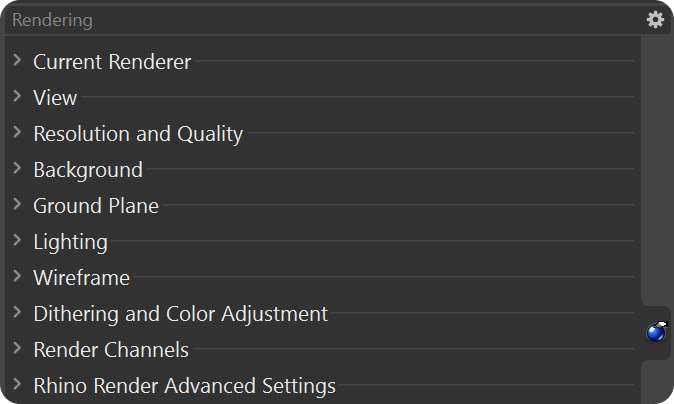
1- Current Renderer
The Current Renderer option determines which rendering engine Rhino will use to render your model. Rhino Render is the default engine, but Rhino also supports third-party plug-ins, allowing you to switch to other rendering engines depending on your needs.

2- View
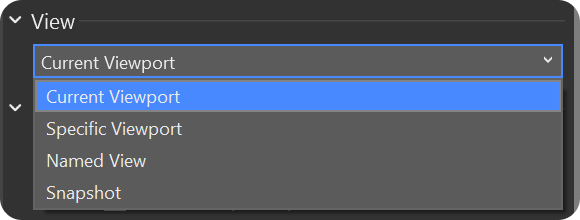
Current Viewport: This option renders the scene from the perspective of the currently active viewport. If you're actively working in a particular viewport (e.g., Top, Front, Perspective), selecting this option will render exactly what you see in that window.
Specific Viewport: Choose this option if you want to render from a different viewport than the one you're currently working in. You can select a viewport from a list of available viewports. This is useful if you want to render from a specific angle or projection without changing your current working view.
Named View: If you have previously saved specific viewpoints, known as Named Views, you can select one from the list to render. Named Views are predefined camera positions, allowing you to render consistently from the same angle, which is especially useful for comparisons or iterative design processes.
Snapshot: Allows you to render the model as it appeared at a particular moment in time, based on snapshots you've saved. This is ideal for rendering different stages of a design or capturing specific configurations of your model.
3- Resolution and Quality:
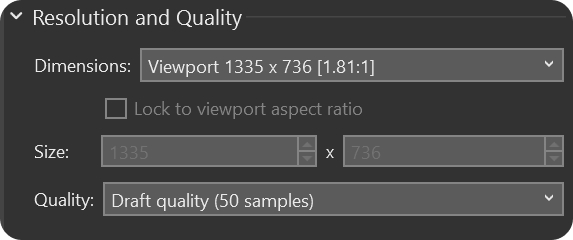
Viewport Size: Renders using the current pixel size of the active viewport.
Custom Size: Allows you to specify custom pixel dimensions for the render.
Preset Sizes: Choose from predefined pixel dimensions or create your own by adding a
render_sizes.txtfile in Rhino’s installation directory.Lock to Viewport Aspect Ratio: Keeps the aspect ratio consistent when adjusting width or height.
Size & Units: Defines the image size in pixels, inches, millimeters, or centimeters. The DPI setting (dots per inch) is crucial for determining print quality.
Quality Settings:
Low Quality: 15 samples—quick and basic.
Draft Quality: 50 samples—faster previews.
Good Quality: 500 samples—balanced quality and speed.
Final Quality: 1500 samples—highest quality for final renders.
4- Background
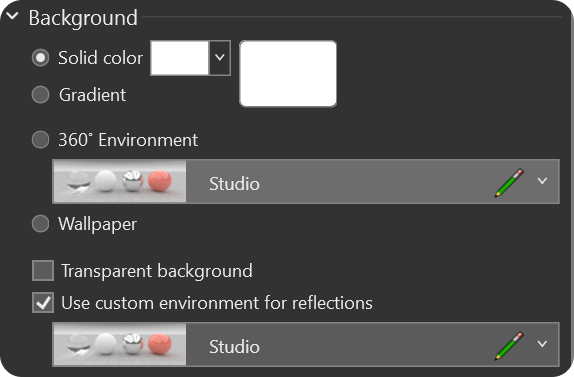
The background in Rhino refers to what appears behind your model in the render, filling the space where no objects are present. It’s a 2D visual element that does not interact with the 3D environment but significantly influences the overall mood and presentation of your render.
Solid Color: Renders a single, uniform color as the background.
Gradient: Creates a smooth transition between two colors from top to bottom.
360° Environment: Renders the environment surrounding the model, capturing the portion that the camera sees. This option is ideal for creating realistic reflections and lighting effects.
Wallpaper: Uses the current viewport’s wallpaper as the background. This is useful if you have set a specific image as a reference or background in the viewport.
Transparent Background: Renders the background as transparent, using an alpha channel. This is especially useful for post-processing in image editing software, allowing you to place the rendered model over any background you choose later on.
5- Ground Plane
Turns on the ground plane. The Ground Plane in Rhino is an invisible surface that acts as the base on which your model "sits." It provides a reference for shadows, reflections, and the overall interaction of your model with its environment during rendering.

6- Lighting
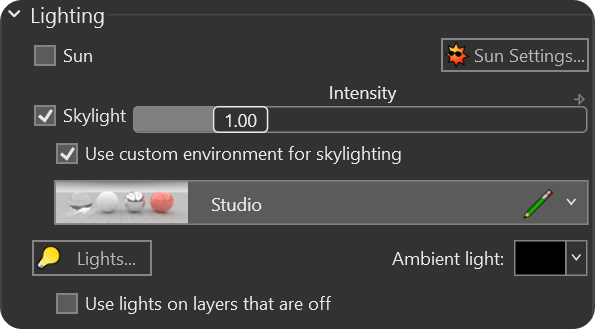
Lighting is a crucial element in rendering, as it defines how your model is illuminated, casting shadows and creating depth. Rhino provides several lighting options to simulate natural and artificial light sources.
Lighting Options:
Sun: Activates the Sun, simulating natural sunlight. This light source moves based on geographic location and time, casting realistic shadows and lighting your model as if it were outdoors.
Skylight: Turns on the Skylight, which provides diffuse, ambient light similar to the soft illumination you would get under a cloudy sky. This helps to evenly light your model from all directions.
Intensity: Adjusts the Skylight Intensity, allowing you to control how strong or soft the skylight effect is. Increasing the intensity makes the scene brighter, while lowering it creates a more subdued light.
Use Custom Environment for Skylighting: This option lets you set a Custom Environment as the source of skylight, instead of the default one. This can be an HDR image or a specific sky texture, giving you more control over the lighting ambiance.
Lights Panel: Opens the Lights panel, where you can manage all other light sources in the scene, such as point lights, spotlights, and area lights, allowing for more detailed and specific lighting setups.
7- Whireframe
In Rhino, wireframe elements like curves, edges, and annotations can be included in your renders to provide additional detail and context. This is particularly useful in technical illustrations or when you want to highlight the structural aspects of your model.
See this in lesson 5: Post Effects
8- Dithering and Color Adjustment
Dithering: Is used to reduce banding, a visual artifact caused by the limited color depth of monitors and certain image formats (like JPEG or PNG).
Gamma Correction: Adjusts the brightness and contrast of your rendered image to ensure it looks correct on a standard monitor. Since monitors display colors non-linearly, the Gamma value helps correct this, resulting in an image that appears more natural and true to life.

9- Render Channels
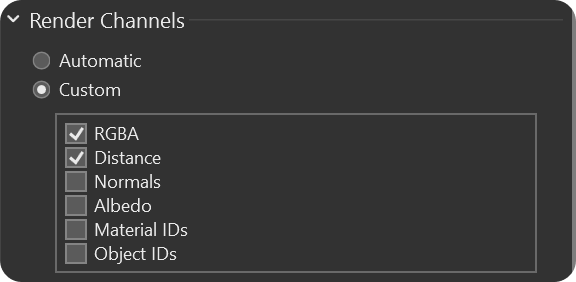
Render Channels in Rhino allow you to output different types of data from a render. Each channel captures a specific aspect of the scene, which can be used individually or combined in post-processing to create more refined and flexible visual results.
Rhino automatically enables the necessary render channels based on the rendering setup. This is convenient if you want Rhino to handle the technical details.
Allows you to manually select which render channels to include, giving you control over the specific types of data you want to extract from the render.
10- Advanced Settings
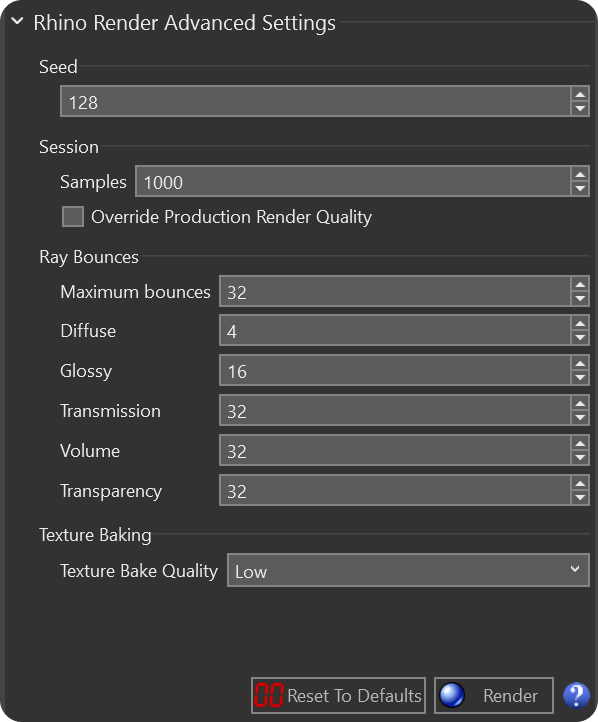
The Advanced Settings in Rhino Render provide control over noise reduction, sample quality, light interactions, and texture baking. Adjusting these settings helps balance rendering quality and performance based on your specific needs.
Last updated
Was this helpful?