# Cap
### **Step 1**: Round Cap Command
Go to the **Solid** tab and use the **Round Cap** command to create a cap for the outer end of the shank.
 Select the outer end as the curve and activate the **Flip** option. Set the height to **0.75 millimeters**.
 ### **Step 2**: Join
Select the cap and the rest of the shank, then type **Join** in the command bar or press the **Join button** to unite them into a single mesh.
### **Step 2**: Join
Select the cap and the rest of the shank, then type **Join** in the command bar or press the **Join button** to unite them into a single mesh.
 ### **Step 4**: Cap Command
Select the shank and type **Cap** in the command bar to close the shank.
### **Step 4**: Cap Command
Select the shank and type **Cap** in the command bar to close the shank.
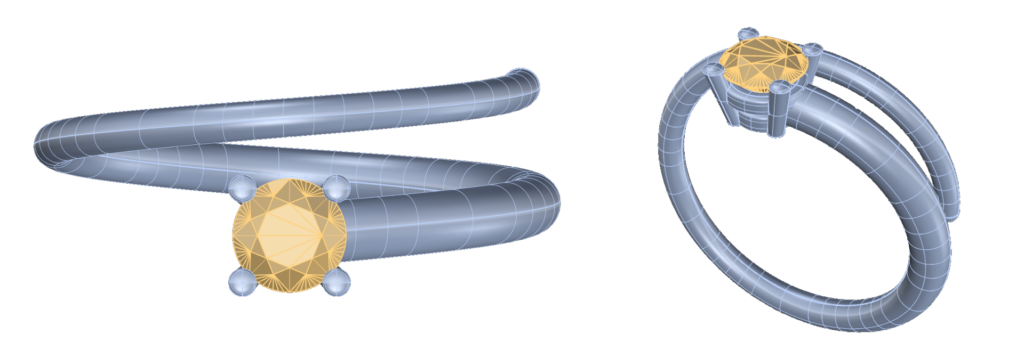
 ### **Step 5**: Show the basket
Show the basket and the gem, by type show in the command prompt, or by click the outliner.
### **Step 5**: Show the basket
Show the basket and the gem, by type show in the command prompt, or by click the outliner.
 ### **Video Lesson**
{% embed url="" %}
**Next Step**: Create a loft to cut the shank.
---
# Agent Instructions: Querying This Documentation
If you need additional information that is not directly available in this page, you can query the documentation dynamically by asking a question.
Perform an HTTP GET request on the current page URL with the `ask` query parameter:
```
GET https://docs.rhinoartisan.com/tutorials/crafting-engagement-masterpieces/solitaire-collection-third-ring/cap.md?ask=
```
The question should be specific, self-contained, and written in natural language.
The response will contain a direct answer to the question and relevant excerpts and sources from the documentation.
Use this mechanism when the answer is not explicitly present in the current page, you need clarification or additional context, or you want to retrieve related documentation sections.
### **Video Lesson**
{% embed url="" %}
**Next Step**: Create a loft to cut the shank.
---
# Agent Instructions: Querying This Documentation
If you need additional information that is not directly available in this page, you can query the documentation dynamically by asking a question.
Perform an HTTP GET request on the current page URL with the `ask` query parameter:
```
GET https://docs.rhinoartisan.com/tutorials/crafting-engagement-masterpieces/solitaire-collection-third-ring/cap.md?ask=
```
The question should be specific, self-contained, and written in natural language.
The response will contain a direct answer to the question and relevant excerpts and sources from the documentation.
Use this mechanism when the answer is not explicitly present in the current page, you need clarification or additional context, or you want to retrieve related documentation sections.