Creating and modifying materials
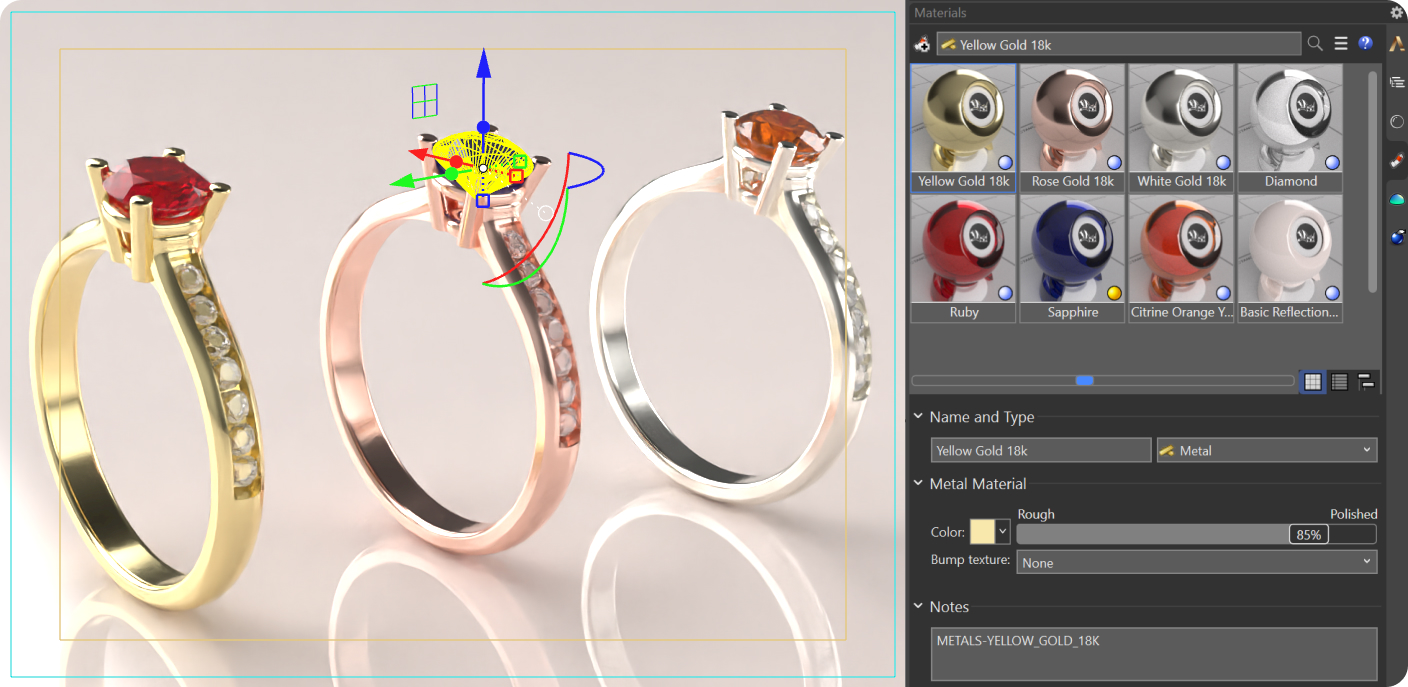
At this point, it is necessary to know that we can modify the default materials. For this we must know that all the materials that we apply to our models, even those replaced by others, will appear in the materials tab ![]() that we see in the image.
that we see in the image.
![]() The material is used by objects not in selection.
The material is used by objects not in selection.
![]() The material is used by objects in selection.
The material is used by objects in selection.
![]() At least one external image used by the material is missing.
At least one external image used by the material is missing.
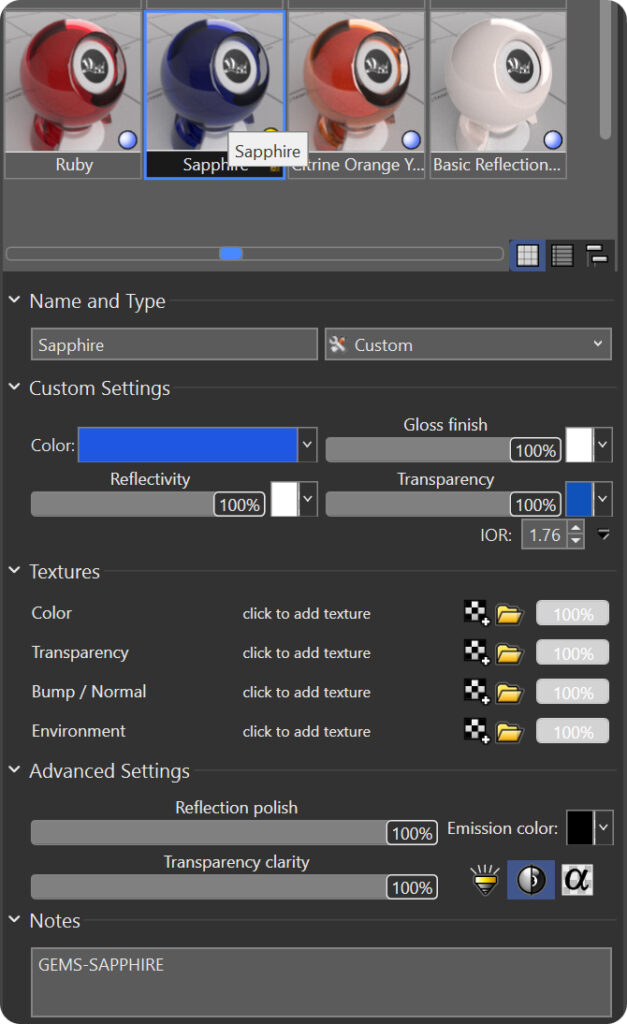
When a material is selected from the menu, its features and characteristics are displayed at the bottom of the screen. These properties can be customized as needed. Since each material type has its own distinct attributes, the options available for modification will vary accordingly.
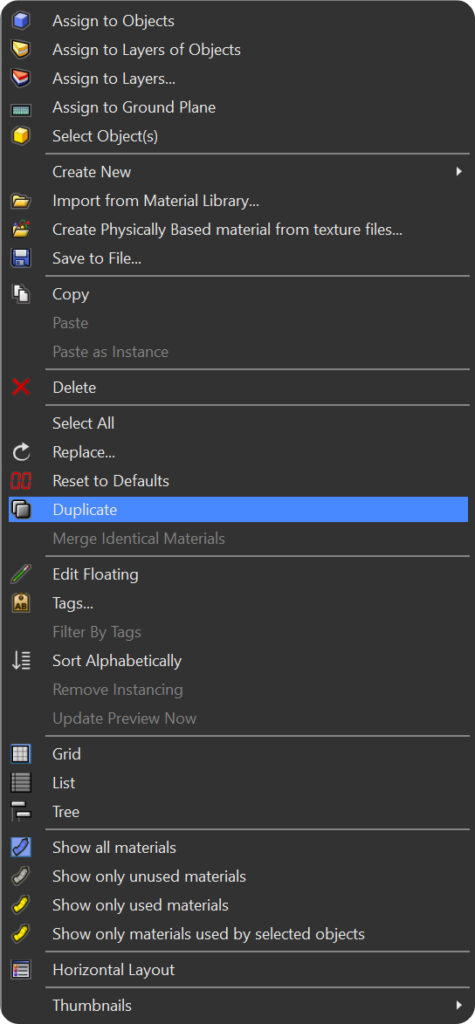
It is advisable to duplicate a material before modifying its characteristics.
Create new materials
To do this, right-click on the material and select 'Duplicate.' Then, assign a new name to the duplicated material.
We can also start a material from scratch, simply by clicking on +.
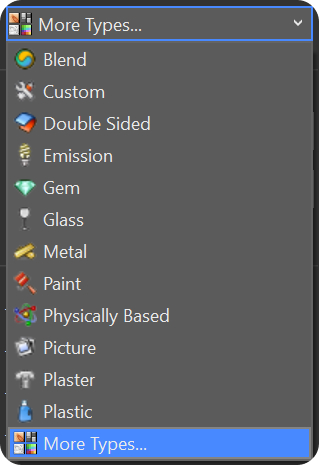
The different types of materials are as follows:
In this course we will focus on Custom has all possible features within of the same material, as can be seen in the image.
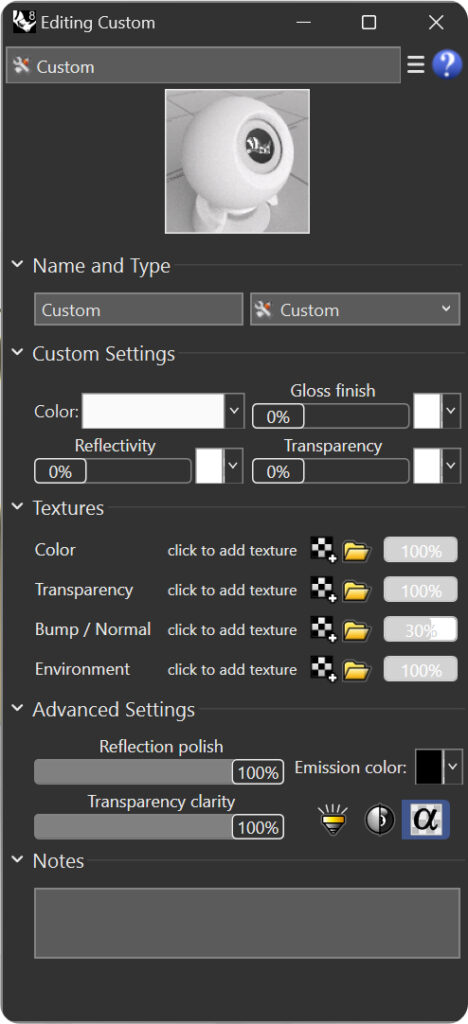
Name of the material
Type: The different types seen in the previous image.
Settings:
Within settings we can modify:
The color of the object
Gloss: Glossy finish
Refl: Reflectivity of the material
Trans: Adjust the transparency of a rendered image.
IOR: Defines the level of transparency according to the index of the refraction scale.
Textures: Textures (bitmap images or algorithmic textures) can be used for color, transparency, bump, and environment.
Tip: To assign an image we will follow three steps.
Click on box (empty - click to assign)< span style="font-weight: 400;">.
Select the image file you want to use.
In the edit box, we specify the percentage of intensity that the image will use to influence the color, transparency, the relief or the environment.
Color: Specifies a texture to use as the material color.

Transparency: Defines a texture to use as material transparency. In a grayscale, the lightest color will be opaque, while black will be transparent.
Example: To the previous green sphere we have applied a texture like the image. We obtain:
Black areas = transparent
Gray areas = semi-transparent
White areas = opaque

Bump/Norm (Relief): Allows you to define the name of a bitmap file that is will map to a surface as a bump map when the scene is rendered. A bitmap image causes a surface to appear bumpy in a rendered image, but does not change the shape of the surface.

Environment: Defines a texture to use as a material environment. It will be mapped onto the surface as if it were reflected.

Advanced settings
Self-Illumination: Allows the material to reproduce its color with shading. The object itself casts shadows on itself, simulating reality.
Fresnel reflectivity: Makes objects reflect fully at some angles and slightly at others , depending on the angle. This effect simulates many transparent or semi-transparent materials, such as glass, plastic, and materials that have a thin transparent glaze, such as laminated paper, polished woods, and paint.
Alpha transparency: Allows images with an alpha channel for transparency to make the object to be transparent in the areas of the image where the alpha channel is applied.
Refl. polish: This option makes the reflection look blurry on the surfaces, if we want to simulate perfectly polished surfaces we will use the value 100%. This option can increase render time.
Transp. Clarity: Controls the clarity of a material's transparency.
Emission col: Adds a color to the shaded result. It doesn't take lighting into account, so if the emit color is white, the object will always appear white. If the emission color is gray, all parts of the object will appear brighter than otherwise.
Last updated
Was this helpful?