Adjusting the Prong Rails

Objective: Learn how to customize the rails of a curved basket setting to support and strengthen the prongs using RhinoArtisan.

In this lesson, we will focus on modifying the rails of the basket setting to ensure that the prongs are secure and maintain their shape. Rails play a crucial role in supporting the prongs, preventing them from opening, and adding overall stability to the setting. Let's dive into the steps required to adjust the rails for your design.

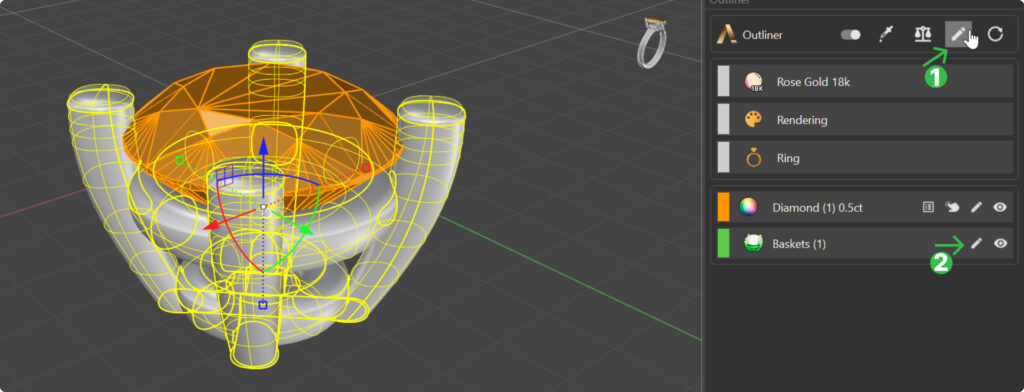
Step 1: Edit the Basket

Start by selecting the basket setting you customized in the previous lesson.

  • Option 1: Click on the edit icon (1) at the top of the panel to enter the editing mode for the basket.

  • Option 2: Click on the edit icon (2) at the outliner.

Step 2: Rail Tab

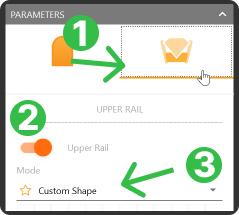
Once in the editing mode, locate and click on the “Rails” tab (1). This tab allows you to customize various aspects of the rails that support the prongs.

In the Rails tab, you have the option (2) to disable the upper rail if needed. For this tutorial, we'll keep it enabled to ensure maximum support for the prongs.

The Rails tab provides options to change the rail mode (3) to either circle or custom shape. The custom shape mode is selected by default, allowing you to tailor the curvature of the prongs to your specific design preferences.

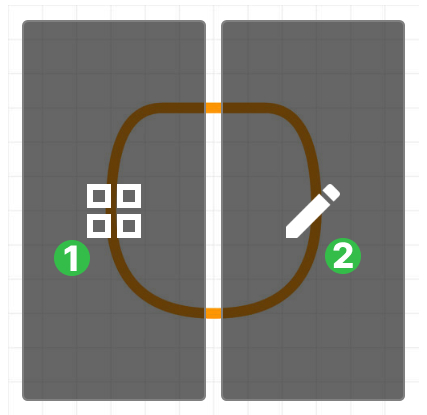
Profile Curve

  • (1) Profile library

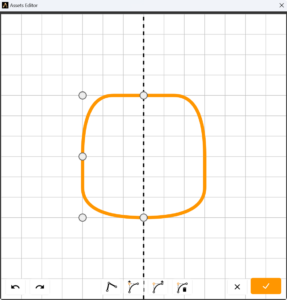
  • (2) Profile Editor

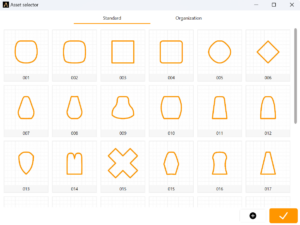
Library

Click on the profile image in the library icon to open the profile library provided by RhinoArtisan.

Here, you can choose from a variety of predefined profiles.

Edit the Profile Curve

If you wish to edit the profile curve manually, click on the pencil icon in the profile editor. This will allow you to create a custom curve for the prongs.

However, for this tutorial, we'll use the default profile and focus on adjusting specific parameters.

For this lesson:

Now, let's refine the rail settings to optimize the support and aesthetic of your basket setting.

Upper Rail Adjustments:

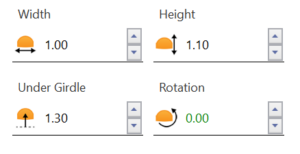
Set the height of the upper rail to 1.10. This will provide sufficient support for the prongs while maintaining the design's elegance.

Increase the under grille parameter of the upper rail to 1.30. This will enhance the structural integrity of the upper rail, ensuring it securely holds the prongs in place.

Lower Rail Adjustments:

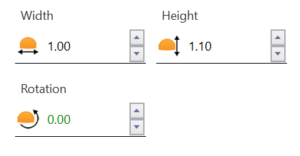
Set the height of the lower rail to 1.10. Matching the height of the upper rail creates a balanced and cohesive design, providing uniform support to the prongs.

After adjusting the rail parameters, click on done at the top of the panel to save your changes.

Video Lesson

Next Steps

With the rails customized and secured, your curved basket setting is now ready to hold the half-carat diamond securely. In the following lesson, we will learn how to use the curator panel to add post and push elements, finalizing the stud earring.

Last updated