# Dynamic Prongs
## Dynamic Prongs
With this command, you can place prongs freely with your mouse or automatically, with precision and flexibility. It's beneficial when setting stones on organic or other complex designs.
Running this command opens its parameters in the Commands toolbar. Your first step is to select the object to which the prongs will be oriented. RhinoArtisan will then automatically detect all the gemstones associated with that object.
In the **Management** panel, you'll find four modes:
1. **Add Prongs**: This mode allows you to manually place prongs with your mouse, using a specified diameter. While RhinoArtisan provides guidance, you have full control over the exact placement of each prong.
2. **Delete Prongs**: In this mode, you can easily remove any prongs you don’t want by simply selecting them.
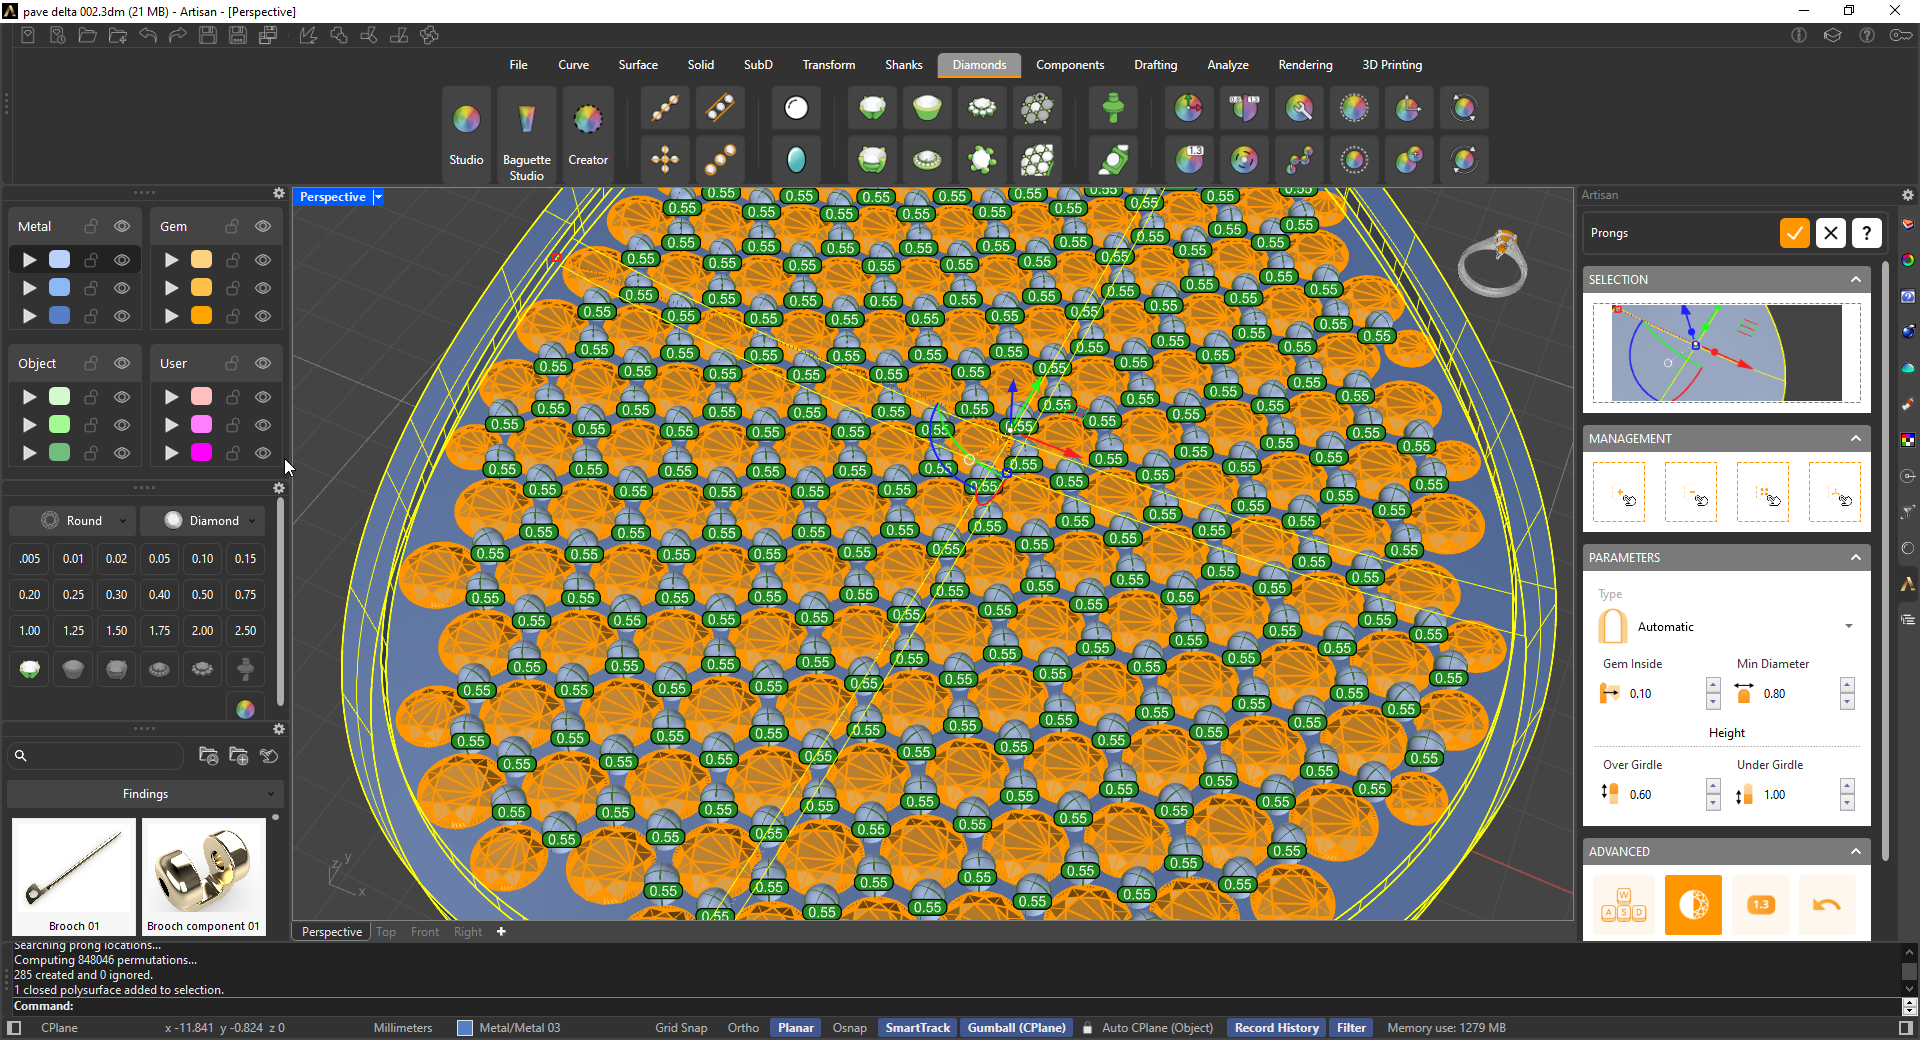
3. **Automatic**: Yes, you read that right! In Automatic mode, RhinoArtisan will place all the prongs for you, such as those in a pavé setting. Just specify the part of the gem to be covered using the Girdle Inside parameter, along with the minimum diameter, prong length, and the portion under the girdle. RhinoArtisan will handle the rest, placing the prongs with precision.
4. **Move Prongs**: As the name suggests, this mode allows you to adjust the position of the prongs as needed.
{% hint style="info" %}
Goldsmith Tip: Try the Automatic mode—it's pure magic!
{% endhint %}
In the **Parameters** panel, you can choose between two prong types:
* **Simple Prong**: This option places a straight prong with a consistent diameter.
* **Advanced Prong**: This allows you to define the prong’s diameter in three different sections, making it especially useful for tiny prongs that need to be thicker at the base to prevent breakage.
* Automatic : The Automatic option will suggest an ideal prong diameter, taking in consideration the Gem Inside parameter as well as the Minimum Diameter that the user has set in its parameters.
Additionally, on the Advanced menu, you can see various optional features, from left to right:
* **Swap Display Mode**: Disabled by default. If enabled prongs will be represented as 2D circles at their base.
* **Show Gem Sizes**: Enabled by default. Shows a bubble with the diameter in millimeters on all prongs.
* **Undo**: If clicked, the previous action will be undone.
* **Symmetry**: Set to None by default. It allows you to place multiple prongs precisely on a mirrored position on various axis.
When you confirm your changes, the Prongs will be grouped and listed on the Outliner toolbar.
{% hint style="success" %}
This element is editable, meaning it can be modified anytime.
{% endhint %}
 Dynamic Prongs
With this command, you can place prongs freely with your mouse or automatically, with precision and flexibility. It's beneficial when setting stones on organic or other complex designs.
Dynamic Prongs
With this command, you can place prongs freely with your mouse or automatically, with precision and flexibility. It's beneficial when setting stones on organic or other complex designs.
 **Add Prongs**: This mode allows you to manually place prongs with your mouse, using a specified diameter. While RhinoArtisan provides guidance, you have full control over the exact placement of each prong.
2.
**Add Prongs**: This mode allows you to manually place prongs with your mouse, using a specified diameter. While RhinoArtisan provides guidance, you have full control over the exact placement of each prong.
2.  **Delete Prongs**: In this mode, you can easily remove any prongs you don’t want by simply selecting them.
3.
**Delete Prongs**: In this mode, you can easily remove any prongs you don’t want by simply selecting them.
3.  **Automatic**: Yes, you read that right! In Automatic mode, RhinoArtisan will place all the prongs for you, such as those in a pavé setting. Just specify the part of the gem to be covered using the Girdle Inside parameter, along with the minimum diameter, prong length, and the portion under the girdle. RhinoArtisan will handle the rest, placing the prongs with precision.
4.
**Automatic**: Yes, you read that right! In Automatic mode, RhinoArtisan will place all the prongs for you, such as those in a pavé setting. Just specify the part of the gem to be covered using the Girdle Inside parameter, along with the minimum diameter, prong length, and the portion under the girdle. RhinoArtisan will handle the rest, placing the prongs with precision.
4.  **Move Prongs**: As the name suggests, this mode allows you to adjust the position of the prongs as needed.
{% hint style="info" %}
Goldsmith Tip: Try the Automatic mode—it's pure magic!
{% endhint %}
In the **Parameters** panel, you can choose between two prong types:
* **Simple Prong**: This option places a straight prong with a consistent diameter.
* **Advanced Prong**: This allows you to define the prong’s diameter in three different sections, making it especially useful for tiny prongs that need to be thicker at the base to prevent breakage.
* Automatic : The Automatic option will suggest an ideal prong diameter, taking in consideration the Gem Inside parameter as well as the Minimum Diameter that the user has set in its parameters.
**Move Prongs**: As the name suggests, this mode allows you to adjust the position of the prongs as needed.
{% hint style="info" %}
Goldsmith Tip: Try the Automatic mode—it's pure magic!
{% endhint %}
In the **Parameters** panel, you can choose between two prong types:
* **Simple Prong**: This option places a straight prong with a consistent diameter.
* **Advanced Prong**: This allows you to define the prong’s diameter in three different sections, making it especially useful for tiny prongs that need to be thicker at the base to prevent breakage.
* Automatic : The Automatic option will suggest an ideal prong diameter, taking in consideration the Gem Inside parameter as well as the Minimum Diameter that the user has set in its parameters.

