# Clipping Sections
## Clipping Sections
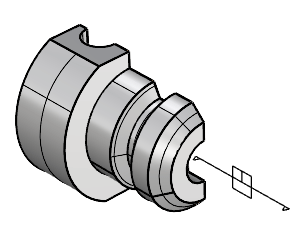
The ClippingSections command creates clipping planes that cut through selected objects with settings to define direction, depth, label, and save section views as Named Views.
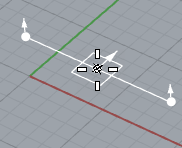
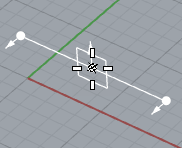
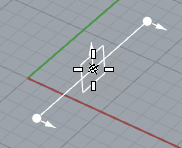
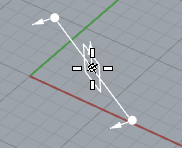
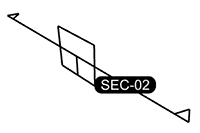
Clipping Section Example
#### **Steps**
1. Select objects to clip (press Enter to section through all objects).
2. Place one or more clipping sections in viewports.
During placement, the clipping widget turns red if it does not intersect eligible objects' overall bounding box in World coordinates.
Command-line options for each clipping section can be set before placing it.
### Command-line options
**Dir:** Sets the clipping section direction.
**CPlane** : The clipping section is parallel to the current CPlane.
**X** : The clipping section is vertical to the current CPlane and parallel to the X-axis.
**Y** : The clipping section is vertical to the current CPlane and parallel to the Y-axis.
**Custom** : The clipping section is vertical to the current CPlane and parallel to the direction defined by two points.
**CustomDepth**
When set to No, the clipping plane depth is infinite. If set to Yes, the Depth option appears at the command line, allowing the user to set the depth.
**Depth:** Defines the thickness of the visible portion of the clipped object. The default depth is zero.
**Clip:** This option enables or disables clipping of the view that is active when the command starts. The views to be clipped can be set or modified at any time in the clipping plane properties.
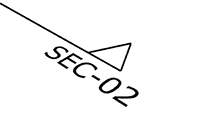
**Name:** Sets the prefix used for the section names. Section names are incremented. For example, if you set the Name=SEC, sections are named SEC\_01, SEC\_02, SEC\_03, etc.
**LabelMode:** Sets how to display section names in viewports. The default label mode is Text.
* **None:** Do not display the name.
* **Dot:** Displays the name as a Dot.
There is no control over the font and size of the dot labels.
**Text:** Displays the name as Text near the direction indicators.
The text label size is proportional to the widget size. The font of the current annotation style on Clipping Plane creation is applied.
**SaveToNamedView:** Creates a [named view](https://docs.mcneel.com/rhino/8/help/en-us/commands/namedview.htm) that corresponds to a view of the section.
{% hint style="info" %}
Note: Sections placed in a perspective viewport will generate named views in perspective projections, not parallel ones.
{% endhint %}
**Flip:** Swaps the clipping section direction.
For more information, please refer to the [Rhino documentation](https://docs.mcneel.com/rhino/8/help/en-us/commands/clippingplane.htm#ClippingSections).
---
# Agent Instructions: Querying This Documentation
If you need additional information that is not directly available in this page, you can query the documentation dynamically by asking a question.
Perform an HTTP GET request on the current page URL with the `ask` query parameter:
```
GET https://docs.rhinoartisan.com/commands/drafting/clipping-sections.md?ask=
```
The question should be specific, self-contained, and written in natural language.
The response will contain a direct answer to the question and relevant excerpts and sources from the documentation.
Use this mechanism when the answer is not explicitly present in the current page, you need clarification or additional context, or you want to retrieve related documentation sections.