Advanced Gems Render: Cutters
To better understand the gemstone rendering process, I will provide a reference video showing the difference in rendering when the gemstone is in contact with the metal versus when it is not. For accurate gemstone rendering, it is important to ensure that no part of the metal overlaps the mesh of the gemstone.
We will now create an example to demonstrate how this issue affects the render. The example is focused solely on the rendering process, in case you’ve ever created a render where the gemstones did not appear correctly. This is just an illustrative example.
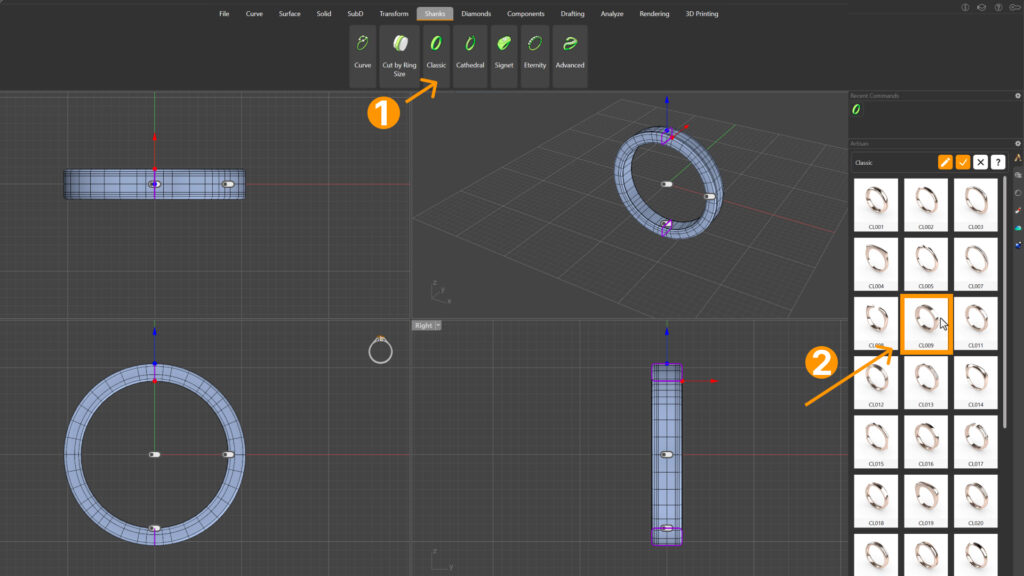
First, go to the “Shanks” tab and select the “Classic” command. From the library, choose the model CL009.
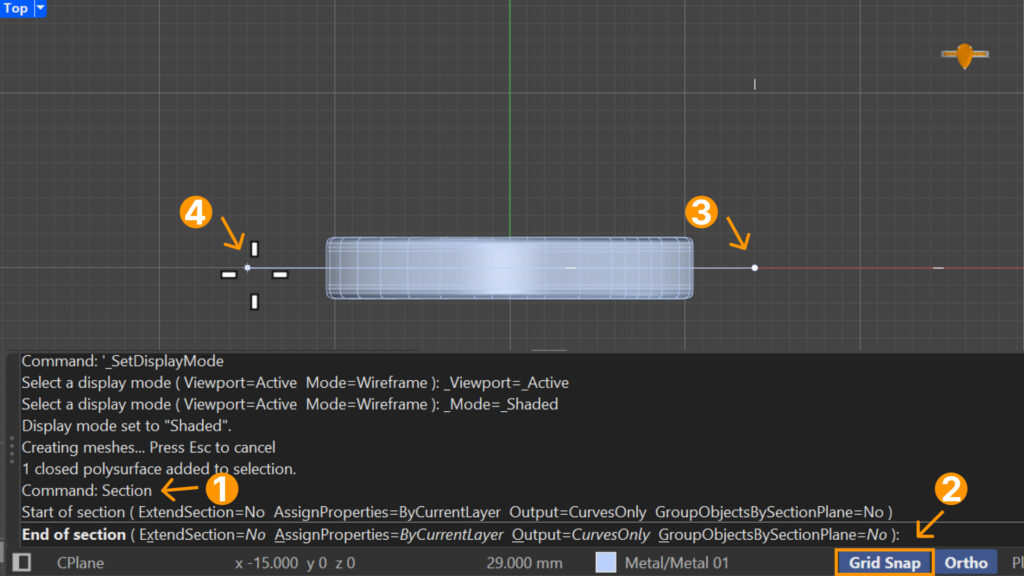
Next, select the shank and create a section to obtain the curve of the ring. To do this, type “Section” in the command bar. With the Snap Grid option activated, select a point on the X-axis to the left and another to the right from the Top view.
Then, go to the “Diamonds” tab and use the “Gem by Curve” command to create some gemstones for this example. Use the section as the reference curve and the shank itself as the surface.
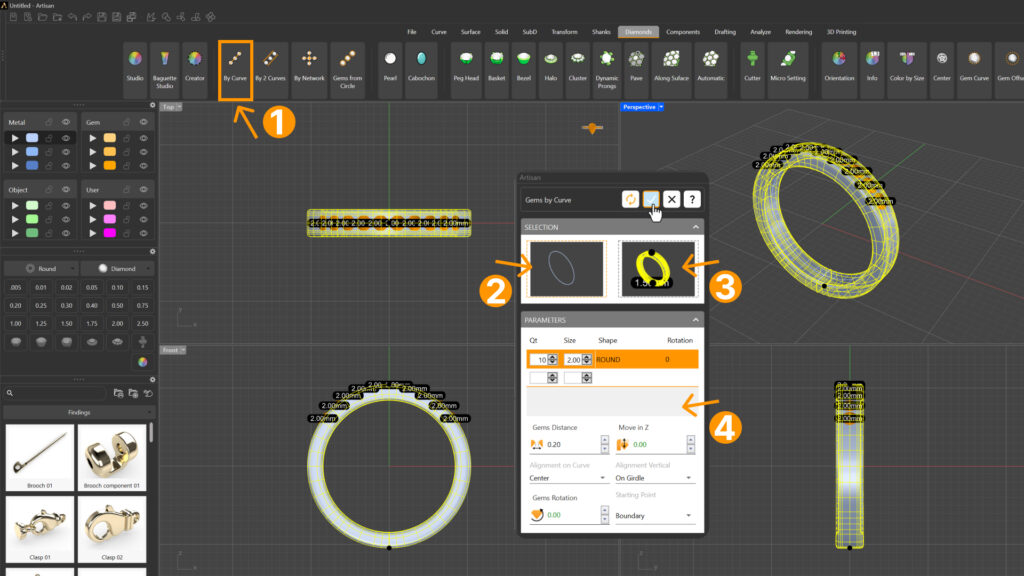
For this example, use 2-carat gemstones. Additionally, position them on the girdle and center them. The number of gemstones is not important, as this is just an example.
Now, apply materials to the metal and the gemstones: Yellow Gold 18k for the metal and diamond material for the gems.
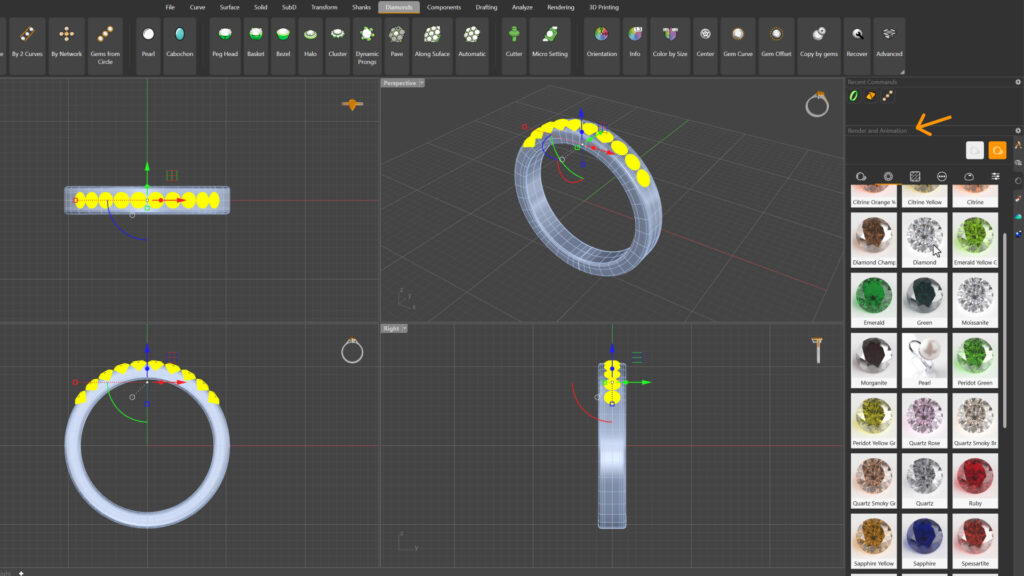
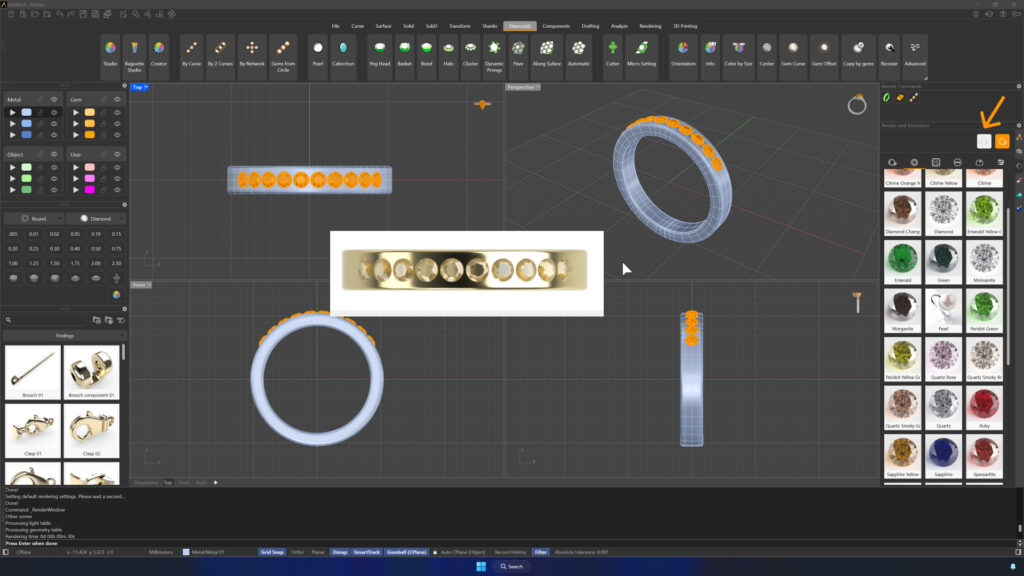
Render a section from the top view to see the result of the gems.
As we can see, the gemstones appear grayish, with details that are not clearly visible. This occurs because the metal overlaps part of the gemstone, causing the light to interact incorrectly with it.
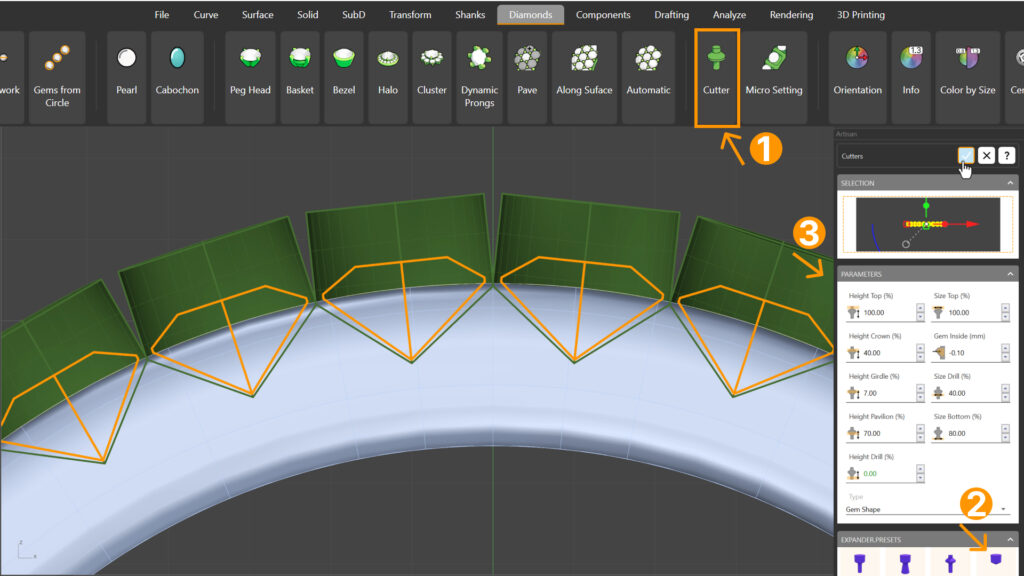
To maximize the gemstone’s appearance, go to the “Diamonds” tab and select the “Cutter” command. We’ll create an example by setting parameters so that the cutter slightly exceeds the size of the gemstone.
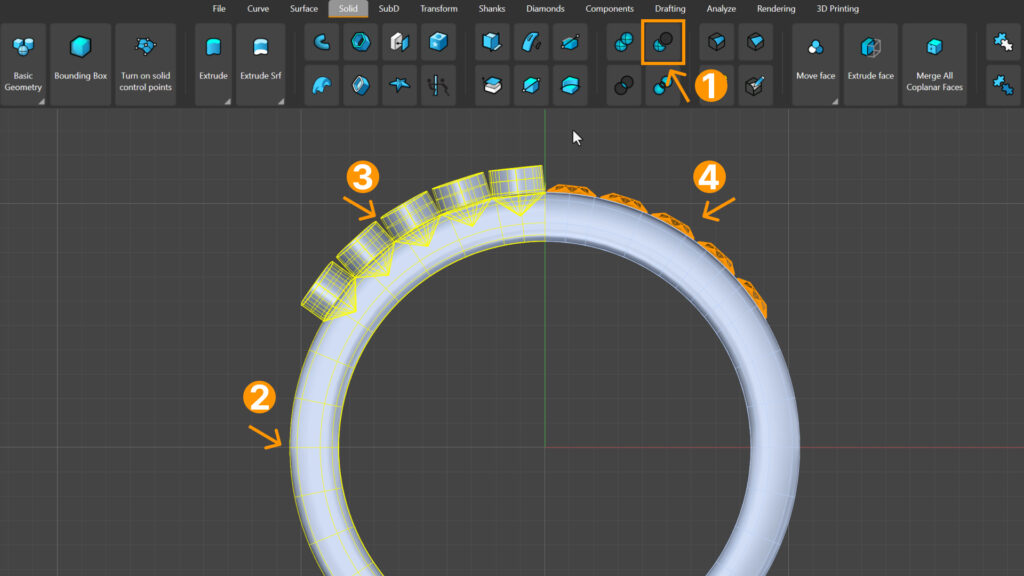
Once created, use the "Boolean Difference" command to cut the metal. Go to the “Solid” tab, select the command, then select the shank, press Enter, then select the cutters, and press Enter.
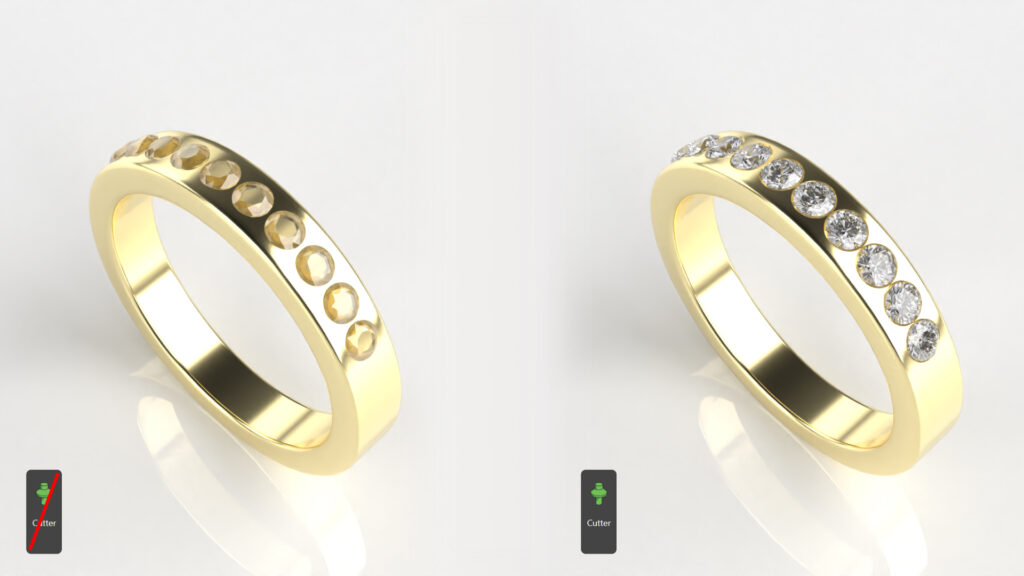
Now, render again to see the result.
As we can see, all the details of the gemstones are now visible.
TIP: Keep in mind that when creating a real piece, the gemstone is often held in place by prongs. These should also be considered during the rendering process.
Last updated
Was this helpful?