Render and Animation
As we have seen in previous lessons, we have a Render and Animation panel from which we can apply materials to our project.
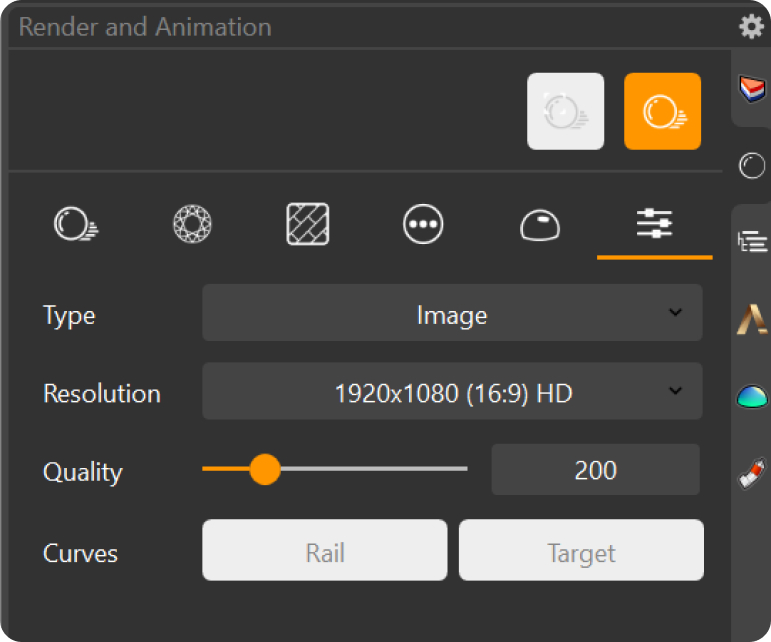
In this lesson, we will focus on the Settings menu, the sixth tab from left to right.

On this menu, you can set the different parameters to generate your rendered image or video:
Type: Sets whether an Image, Turntable video, Snapshots video, or Curves video will be created. Note that videos take considerably longer to create as they are made out of multiple images in sequence.
Resolution: Defines the output resolution of your render, the higher the resolution, the more time it will take to finish creating the render.
Quality: With this parameter, you can decide the resulting quality of your rendered image (or images in the case of a video). Each unit represents a pass the render engine makes to smooth the image. We suggest settling for 200 passes by default.
Mode: Only visible if Turntable, Snapshots, or Curves, is selected on the Type parameter. Can be set to Cycles to use Rhino's default raytracing rendering, or Current Display Mode to use the method you are using now.
Video: Only visible if Turntable, Snapshots, or Curves, is selected on the Type parameter. This sets the duration in seconds and the frame rate of the resulting rendered video. Selecting Custom allows you to define the seconds and fps you want to achieve.
Snapshots: Only visible if Snapshots is selected on the Type parameter. It will display the snapshots you have set, clicking on them will bring your viewport to that point.
Curves: Only visible if Curves is selected on the Type parameter. Displays 2 buttons, Rail, which allows you to select the curve that will follow as a path, and Target, which allows you to select a target that will orient to.
Hint: The time it takes for an image to get rendered will highly depend on the hardware specifications of your device.
Last updated
Was this helpful?